
Have you ever wondered about how to automate tasks on your Mac? Well, you’re in luck because there’s a tool built right into your system that can help – Automator.
How to Use Automator on a Mac
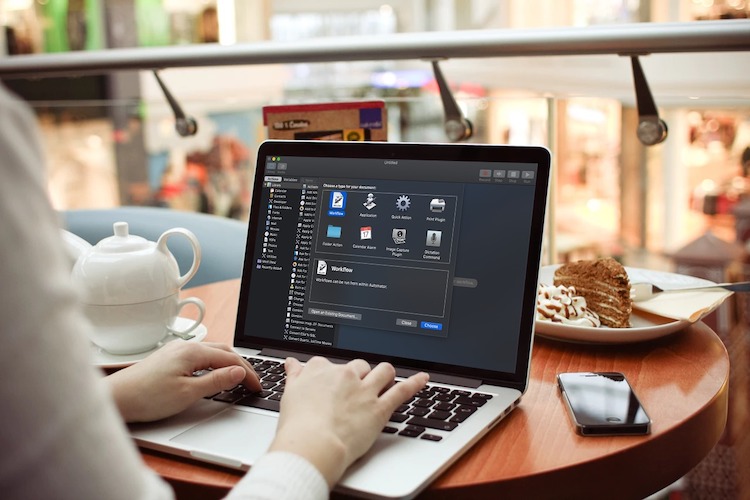
Using Automator on your Mac is simple and can save you a lot of time when it comes to repetitive tasks. To start using Automator, simply launch the app by searching for it in Spotlight or by finding it in your Applications folder.

What is Automator?
Automator is a built-in app on Mac that allows you to create automated workflows to simplify repetitive tasks on your computer. You can use Automator to create workflows that perform simple tasks like renaming files or complex tasks like resizing images.
Why Use Automator?
There are several reasons why you might want to use Automator on your Mac:
- Automate repetitive tasks to save time and increase efficiency
- Create custom workflows to simplify complex tasks
- Reduce the risk of manual errors when performing tasks
- Automatically perform tasks on a schedule
Advantages of Using Automator
The advantages of using Automator are numerous:
- Increased productivity
- Consistency in task performance
- Minimized risk of manual errors
- Reduced workload
The Best Automator Features
Automator has a variety of features that make it a powerful tool for automating tasks on your Mac:
- Over 100 built-in actions to choose from
- Easy drag-and-drop interface for creating workflows
- Access to AppleScript for even more customization
- Ability to save workflows as standalone apps
Automator Review
Overall, Automator is an excellent tool for simplifying your task list on your Mac. With its variety of built-in actions and customizable workflows, you can automate just about any repetitive task, which can help you free up valuable time and increase your productivity.
Automator Q&A
Q: Is Automator only available on Mac?
A: Yes, Automator is only available on Mac as it is a built-in app on the system.
Q: Can I share my workflows with others?
A: Yes, you can share your workflows with others by exporting the workflow and sending it to them or by saving it to a shared folder.
Q: Can I automate tasks on a schedule?
A: Yes, you can automate tasks on a schedule using Automator and the built-in Calendar app.
:max_bytes(150000):strip_icc()/002-automate-opening-applications-and-folders-on-mac-2260908-bb739311bec247ba994ad9f5291cbdb6.jpg)
How to Use Automator on a Mac
If you’re looking to learn how to use Automator on your Mac, you’ve come to the right place. Here are some steps to get started:
Step 1: Launch the Automator app
You can find the Automator app either by searching for it in Spotlight or by navigating to your Applications folder and finding it there.
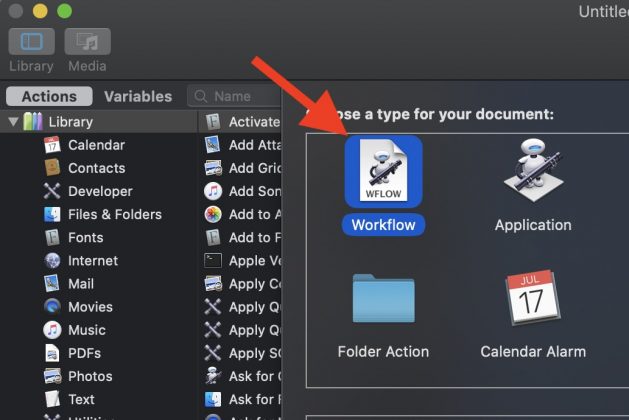
Step 2: Choose a Workflow Type
Once you’ve launched Automator, you’ll be prompted to choose a workflow type. You can choose from several options, including:
- Application
- Folder Action
- iCal Alarm
- Print Plugin
Step 3: Choose Your Actions
Next, you’ll be able to choose from over 100 built-in actions to automate your task. Simply drag and drop the actions you want to use into the workflow area on the right side of the Automator window.
Step 4: Customize Your Workflow
After you’ve added your actions, you can customize them to fit your specific needs. You can adjust parameters like file names, file types, and more. You can also add new actions to your workflow at any time.
Step 5: Run Your Workflow
To run your workflow, simply press the “Run” button in the upper right-hand corner of the Automator window. You can also save your workflow as a standalone app that you can use at any time.
How to Convert Automator Actions as Apps on Mac
If you want to turn an Automator action into a standalone app, you can do so by following these steps:
Step 1: Create Your Workflow
First, create your workflow in Automator and make sure it works as intended.
Step 2: Save Your Workflow as an Application
Next, go to File > Export, and choose “Application” as the file format. This will create a standalone app that you can use whenever you’d like.
Step 3: Customize Your App
You can customize your app in several ways, including by adding an icon and a description to it. You can do this by selecting your app in the Finder, going to File > Get Info, and then adding the information you want.
Step 4: Run Your App
To run your app, simply double-click on it in the Finder. You can also move it to your dock for easy access.
How to Batch Rename Photos With Mac Automator
If you have a lot of photos that need renaming, Automator can help you do this quickly and easily. Here’s how:
Step 1: Create Your Workflow
First, create a new workflow in Automator and choose the “Photos” option for the workflow type.
Step 2: Add the Rename Photos Action
Next, drag and drop the “Rename Photos” action from the Actions menu onto the workflow area. This will open up the Rename Photos action settings.
Step 3: Customize Your Rename Settings
You can customize the rename settings by choosing from several options, including adding a name and a sequence number to the file names.
Step 4: Run Your Workflow
Finally, simply run your workflow by pressing the “Run” button in the upper right-hand corner of the Automator window. All of your selected photos will be renamed according to your specifications.
Whether you’re looking to automate simple tasks or complex workflows, Automator is a powerful tool that can help you save time and increase your productivity. Start experimenting with Automator today and see how it can simplify your daily routine.


")